
Severity: Major · Fix time: 5–15 min · Skill level: Intermediate
413 Request Entity Too Large — also written as “413 Content Too Large” in newer HTTP specs — is an error that appears when the data you’re sending to the server exceeds the maximum request body size the server is configured to accept. In WordPress, this almost always surfaces when uploading images, videos, PDF files, or plugin and theme ZIP files that exceed the limit set in PHP, Nginx, or Apache configuration.
The error is a server rejection, not a failure mid-upload. The server checks the content length before processing the payload and returns 413 the moment it detects the size limit would be exceeded. From a visitor’s perspective, the upload simply fails with no obvious explanation — especially frustrating when they’re trying to submit a portfolio, attach a file to a form, or install a large plugin.
Three separate layers control upload size in a WordPress stack: PHP (upload_max_filesize and post_max_size), the web server (client_max_body_size on Nginx, LimitRequestBody on Apache), and in some setups, a WAF or CDN. All three must allow the file size or the upload fails at whichever layer has the lowest limit.
Need a quick map of every WordPress error? See our 70+ WordPress Errors Guide → for a categorized reference of every common WordPress issue.
[Image: WordPress media upload screen showing a failed upload with the 413 error message]
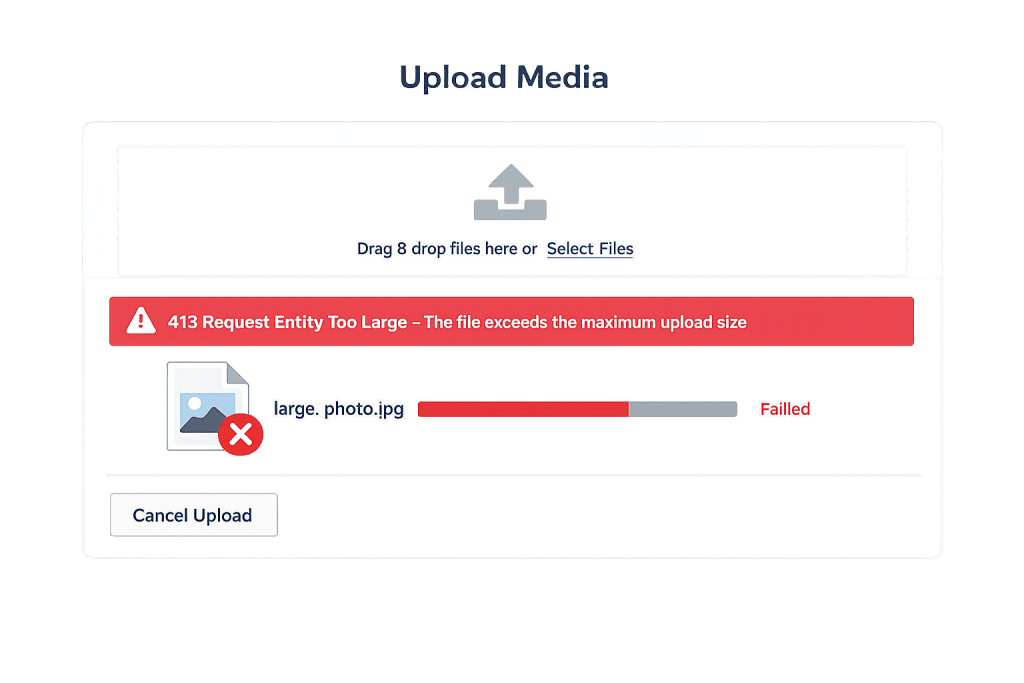
How 413 Request Entity Too Large Works
The 413 error sits at the boundary between what your server is willing to receive and what you’re asking it to handle. When a browser sends a file upload, it includes a Content-Length header declaring the size. The server checks that value against its configured limit before accepting the body. If the declared size exceeds the limit, the server responds with 413 and closes the connection — the file never transfers.
The limits you need to understand:
upload_max_filesize(PHP) — The maximum size of a single uploaded file. Default: 2MB. This is the limit most people hit first.post_max_size(PHP) — The maximum size of the entire POST body, which includes the file plus form fields. Must be set higher thanupload_max_filesize. Default: 8MB.memory_limit(PHP) — PHP needs to hold the file in memory temporarily. If memory_limit is lower than the file size, the upload fails even if other limits are sufficient. Default: 128MB; the recommended standard is 256M.client_max_body_size(Nginx) — Nginx’s own limit on request body size. Default: 1MB — the most aggressively low of all the defaults and the most commonly missed. Must be raised on Nginx servers.LimitRequestBody(Apache) — Apache’s equivalent directive. Default is effectively unlimited in Apache itself, but security configurations often set it.
When Nginx returns the 413, the error message literally says “413 Request Entity Too Large” in the Nginx format. When PHP triggers it, it may display as “413 Content Too Large.” The difference in wording tells you which layer is rejecting the upload.
Check This First — 2-Minute Diagnostic
Before editing any configuration files, run through this checklist:
- Check the exact file size — What is the file you’re trying to upload? Compare it to the current PHP upload limits visible in WordPress at Media → Add New (WordPress shows the max upload size beneath the upload button).
- Identify your server type — Is your hosting Apache or Nginx? Check your hosting control panel or ask your host. This determines which configuration file to edit.
- Try a smaller test file — Upload a much smaller file (under 1MB) to the same location. If it succeeds, the issue is purely the size limit, not a permission or plugin problem.
- Check Nginx-specific hosting — If you’re on a VPS or managed Nginx host, the
client_max_body_sizedirective is almost certainly the culprit, as its 1MB default is far below most real-world file upload needs. - Look in the WordPress error log — In
wp-content/debug.log(if WP_DEBUG is active) or your server error log, a PHP memory exhausted message accompanying the 413 indicates amemory_limitissue, not just the upload size setting.
Purpose & Benefits
1. Enabling Real-World File Workflows
The default PHP upload limit of 2MB was set in an era when web hosting was resource-constrained. Modern business websites routinely handle high-resolution photography, PDF brochures, video thumbnails, and plugin archives that far exceed that limit. Correctly configuring upload limits — at all three layers — is a baseline requirement for any functional WordPress site, not an advanced optimization. Our WordPress hosting services are configured with sensible upload defaults from the start.
2. Unblocking Plugin and Theme Installation
WordPress installs plugins and themes by accepting a ZIP file upload through the admin dashboard. Premium plugins from Elementor, WooCommerce, or WPML can easily exceed 10MB. A 413 error on the plugin upload screen prevents installation entirely, forcing the site owner to use SFTP or a hosting file manager instead. Raising the upload limit removes this friction without compromising security.
3. Supporting eCommerce and Portfolio Use Cases
WooCommerce product image galleries, downloadable digital products, and portfolio sites with high-resolution photography all require generous upload limits. A WooCommerce store where customers upload proof of purchase or custom artwork files needs upload limits tuned to the actual file sizes involved. Getting the limits right once — and documenting them — prevents recurring support issues as the site grows.
Examples
1. Plugin Installation Fails with 413
A site owner purchases a premium page builder plugin and downloads the ZIP file from the developer’s site. The ZIP is 18MB. They attempt to install it via Plugins → Add New → Upload Plugin and see a 413 error. Their hosting plan uses Nginx with the default client_max_body_size of 1MB. The fix: add client_max_body_size 64M; to the Nginx server block and reload Nginx — or use the hosting control panel’s PHP settings to raise upload_max_filesize and post_max_size, then also update the Nginx limit.
2. WooCommerce Downloadable Product Upload Fails
A digital product store sells high-resolution stock photos. Each photo file is between 25MB and 80MB. When the store owner tries to attach a downloadable file to a WooCommerce product, uploads above 8MB fail with 413. Their PHP post_max_size is set to 8MB, which is Apache’s effective cap on this server. The fix requires editing php.ini or adding PHP directives to .htaccess:
# Add to .htaccess to raise PHP upload limits on Apache
php_value upload_max_filesize 128M
php_value post_max_size 256M
php_value memory_limit 256M
php_value max_execution_time 300
After saving, refresh the WordPress admin — the new limits appear under Media → Add New.
3. Video Thumbnail Upload Fails on Nginx VPS
A media company runs WordPress on a self-managed Nginx VPS. They try to upload a 12MB video thumbnail image and receive a 413. Their php.ini allows up to 64MB, but Nginx’s client_max_body_size is still at its default 1MB — it rejects the upload before PHP ever sees the file. The fix requires editing the Nginx server block:
# Add inside your server {} block in nginx.conf
# or in /etc/nginx/sites-available/yourdomain.conf
server {
    # Raise the body size limit to accommodate large uploads
    client_max_body_size 128M;

    location / {
        try_files $uri $uri/ /index.php?$args;
    }
}
After saving, run nginx -t to validate syntax, then systemctl reload nginx.
Common Mistakes to Avoid
- Only raising
upload_max_filesizewithout matchingpost_max_size—post_max_sizemust be larger thanupload_max_filesizebecause it governs the entire POST body, not just the file. Ifupload_max_filesizeis 64M andpost_max_sizeis still 8M, uploads above 8MB will still fail. - Forgetting the Nginx
client_max_body_sizeon VPS or Nginx hosting — This is the single most common reason PHP-level fixes don’t work on Nginx servers. The web server rejects the upload before PHP processes it. Changes tophp.inialone accomplish nothing when Nginx is the gatekeeper. - Using excessively high limits without justification — Setting
upload_max_filesizeto 512M orpost_max_sizeto 1G “just to be safe” wastes server memory and can create vulnerability vectors. Set limits to a reasonable ceiling based on your actual upload needs — typically 64M–128M covers most WordPress workflows. - Editing the wrong
php.inifile — Many servers have multiple PHP versions and multiplephp.inifiles (CLI vs. FPM vs. Apache module). Editing the wrong one has no effect. Confirm which PHP configuration is active usingphpinfo()or your hosting dashboard’s PHP settings panel. - Not testing after changes — The new upload limit doesn’t appear in WordPress until the page is refreshed and the server has reloaded its configuration. Always verify the change took effect by checking Media → Add New and noting the displayed maximum upload file size.
Best Practices
1. Set PHP Upload Limits in wp-config.php When php.ini Is Inaccessible
On shared hosting plans where you cannot edit php.ini directly, WordPress allows PHP configuration overrides through wp-config.php. Add these lines before the “stop editing” comment:
<?php
// Raise PHP upload limits for WordPress media and plugin installs
@ini_set( 'upload_max_filesize', '64M' );
@ini_set( 'post_max_size', '128M' );
@ini_set( 'memory_limit', '256M' );
Some hosts restrict ini_set() for security reasons — in that case, use the .htaccess method shown in the Examples section or contact your host to adjust the values at the server level.
2. Align All Three Layers Before Testing
When resolving a 413, treat all three layers as a checklist: PHP (upload_max_filesize, post_max_size, memory_limit), web server (client_max_body_size on Nginx or LimitRequestBody on Apache), and if applicable, any CDN or WAF body size rules (Cloudflare, for instance, imposes its own request size limits on certain plans). A fix that addresses only one layer will appear to fail when the bottleneck shifts to a different layer.
3. Confirm Changes With phpinfo() or the WordPress Health Check
After making configuration changes, verify they took effect. The fastest method in WordPress: go to Tools → Site Health → Info → Server and check the “Upload max filesize” and “PHP post max size” values. For Nginx changes, curl -X POST -F "file=@/tmp/testfile.bin" https://yourdomain.com/wp-admin/async-upload.php returns a 413 if the Nginx limit is still too low, or a 401 if the limit is now sufficient (auth required, but not size-rejected).
4. Set Sensible Limits Based on Your Use Case
Match upload limits to your site’s actual needs rather than setting arbitrary high values. A blog that only publishes posts doesn’t need a 256M upload limit. A WooCommerce store selling downloadable video content does. As a baseline for most WordPress sites: upload_max_filesize = 64M, post_max_size = 128M, memory_limit = 256M. Adjust upward only when your specific use case requires it.
5. Document Your Server Configuration
After resolving a 413, record which file you edited, what values you set, and where the file lives. Configuration files on VPS hosting are commonly overwritten during server software updates, and undocumented custom values disappear silently. Keeping a SERVER-NOTES.md in a private repository or a note in your hosting control panel prevents the same 413 from recurring six months later.
Frequently Asked Questions
What causes a 413 Request Entity Too Large most often in WordPress?
The most frequent cause is attempting to upload a media file, plugin ZIP, or theme ZIP that exceeds the PHP upload_max_filesize or post_max_size limit. On Nginx hosting, the server’s client_max_body_size directive (default: 1MB) is often lower than the PHP limits and becomes the bottleneck. The WordPress Media Library shows the current maximum upload size beneath the upload button — that’s the first number to check.
How do I fix a 413 error when locked out of wp-admin?
If the 413 is blocking your wp-admin upload and you need to install a file, use SFTP to transfer the plugin or theme ZIP directly to the wp-content/plugins/ or wp-content/themes/ directory. WordPress will recognize it on the next admin page load and activate it normally. Meanwhile, edit your PHP and web server configuration to raise the limits permanently.
Can a 413 error hurt my SEO?
Directly, no — a 413 affects upload requests, not page rendering. Googlebot doesn’t submit file uploads. Indirectly, if the 413 is preventing you from uploading optimized images or updating your site’s visual content, the lack of fresh content and properly sized images can affect performance scores and engagement metrics over time.
Does my CDN or WAF affect the upload size limit?
Yes. Cloudflare, for example, limits upload sizes based on your plan — free and Pro plans have a 100MB maximum request body size for uploads. If your PHP and Nginx limits are set higher than your CDN’s ceiling, uploads above the CDN limit will fail regardless of your server configuration. Check your CDN’s documentation for its specific upload size restrictions.
Why does raising upload_max_filesize alone not fix the 413?
Because post_max_size acts as an outer wrapper around the entire POST body, including the file. If upload_max_filesize is 64M but post_max_size is still 8M, any upload over 8MB fails at the post_max_size boundary. Additionally, on Nginx servers, client_max_body_size is enforced before PHP sees any data — fixing PHP limits has no effect until the Nginx limit is also raised.
Related Glossary Terms
- 500 Internal Server Error
- Memory Exhausted Error
- PHP
- htaccess
- SFTP
- wp-config
- WooCommerce
- HTTP Error Uploading Images
How CyberOptik Can Help
Still broken? Our team fixes WordPress errors like this in under 30 minutes for maintenance clients. A 413 error blocking file uploads or plugin installs often involves coordinating changes across PHP configuration, web server settings, and sometimes your CDN — and it’s easy to miss one layer. We handle server configuration adjustments, verify limits are properly applied at every layer, and ensure your WordPress site is set up to handle your actual workflow. Contact us to discuss your site or learn about our WordPress maintenance plans.