Media Library is the built-in WordPress interface for uploading, organizing, and managing media files — including images, videos, audio files, PDFs, and other documents. Every file you upload through WordPress — whether added directly to a post, set as a featured image, or uploaded on its own — is stored in the Media Library and recorded in the WordPress database as an attachment. The library gives you a centralized location to browse, search, edit, and reuse all media assets across your site.
For site owners managing an active website, the Media Library becomes one of the most frequently used areas of the WordPress admin. Understanding how it works — including how WordPress handles image sizes, file organization, and attachment records — helps you keep your site running efficiently and avoid common issues that accumulate over time, like redundant uploads, missing alt text, or oversized images that slow down page load times.
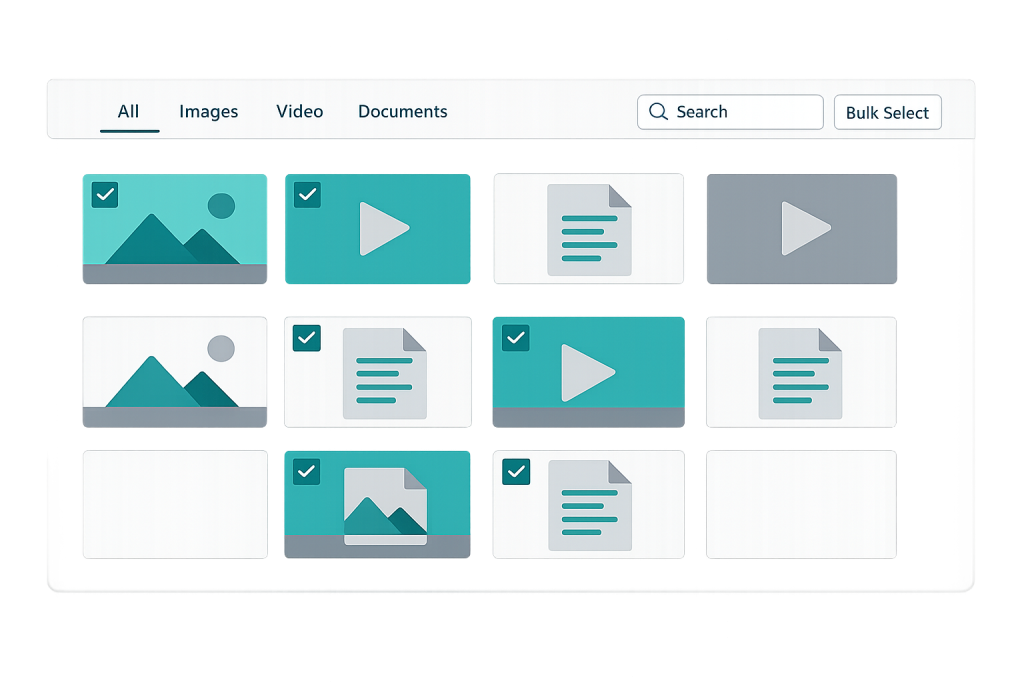
[Image: Screenshot of the WordPress Media Library grid view showing uploaded images with filter options, search bar, and bulk action controls]
How the Media Library Works
When you upload a file to WordPress, several things happen automatically:
- File upload — The file is saved to your server’s
/wp-content/uploads/directory, typically organized by year and month (e.g.,/wp-content/uploads/2026/03/). - Database record — WordPress creates a post record of type “attachment” in the database, storing file metadata: title, caption, alt text, description, file type, and original file path.
- Image size generation — For images, WordPress automatically generates multiple size variants based on settings in Settings > Media (typically thumbnail, medium, and large), plus any custom sizes registered by your theme or plugins.
- Attachment metadata — File dimensions, EXIF data, and generated size paths are stored as post metadata.
You can view the Media Library in two ways: Grid view (thumbnail previews) and List view (sortable table of details). Filters let you browse by file type, date, or media that’s unattached to any post or page.
Purpose & Benefits
1. Centralized Asset Management
Rather than tracking down images scattered across individual posts, the Media Library gives you one place to search, reuse, and update media. When you need the same image on multiple pages — a logo, a headshot, a product photo — you upload it once and reference it from anywhere. This avoids duplicate files and keeps your media footprint manageable. Assets can be organized further using third-party plugins that add folder or tagging functionality.
2. Built-In Image Editing
The Media Library includes basic image editing tools accessible by clicking any image and selecting “Edit Image.” You can crop, rotate, flip, and scale images directly within WordPress without needing a separate editor. Changes can be applied to the full image or only to specific generated sizes. For quick adjustments — cropping a header image or correcting an orientation issue — this built-in editing is often all you need.
3. SEO and Accessibility Data Management
Every media file in the library has fields for alt text, caption, title, and description. The alt text field is particularly important: it describes the image for screen readers (supporting accessibility) and is used by search engines to understand image content. Managing alt text through the Media Library allows you to update it globally — a change made to an attachment’s alt text in the library applies wherever that attachment is used via its attachment ID. This makes the Media Library an important touchpoint for both lazy loading and SEO work.
Examples
1. Featured Image Assignment
A blog post is drafted in the WordPress editor. The author opens the featured image panel and clicks “Set featured image.” The Media Library opens, displaying uploaded images. The author selects a previously uploaded photo — no re-upload needed. WordPress stores the attachment ID in the post’s metadata, and the theme retrieves and displays the image using that ID. If the image’s alt text was set in the Media Library, it carries through automatically.
2. Reusing a Company Logo Across Multiple Pages
A web designer uploads the company logo once to the Media Library. When building the homepage, about page, and contact page, they insert the logo from the library rather than uploading it three times. If the logo is later updated — say, a refreshed version — replacing the original file (using a plugin that handles media replacement) updates it everywhere it appears across the site.
3. Bulk Alt Text Audit
A site owner runs an accessibility audit and discovers that dozens of images are missing alt text. Using the Media Library list view, they can sort by attachment type, click into each image, and add alt text directly to the attachment record. Some accessibility plugins also add bulk editing capabilities to this workflow, making it possible to review and update alt text across many images more efficiently.
Common Mistakes to Avoid
- Uploading oversized images — WordPress generates smaller display sizes from your uploaded file, but the original full-resolution file remains on the server. Uploading a 12MB RAW photo when a 500KB optimized JPEG would serve the same purpose wastes server storage and slows backend loading. Resize and optimize images before uploading.
- Leaving alt text blank — Missing alt text affects both accessibility (screen reader users get no image context) and SEO (search engines can’t understand image content). Every meaningful image should have descriptive alt text.
- Deleting media attached to posts without checking usage — Deleting an image from the Media Library removes it permanently. If that image is displayed on published pages, those pages will show broken image icons. Always check where an image is used before deleting it.
- Accumulating orphaned attachments — Every image upload — including ones from old drafts, failed experiments, or deleted pages — remains in the Media Library. Over time, this creates significant database and storage bloat. Periodic cleanups using WP-CLI or a maintenance plugin keep things manageable.
Best Practices
1. Optimize Images Before Uploading
Compress and resize images to appropriate dimensions before uploading them to WordPress. A hero image displayed at 1440px wide doesn’t need to be uploaded at 4000px wide. Use tools like Squoosh, TinyPNG, or an image optimization plugin that handles compression automatically on upload. Appropriately sized source files reduce server storage, improve lazy loading efficiency, and give WordPress better source material for generating its size variants.
2. Fill In Alt Text for Every Meaningful Image
Set descriptive alt text for every image as you upload it — or in bulk via the Media Library list view. Alt text should describe what’s in the image in plain language (not stuff keywords). Decorative images that add no informational value can have empty alt text (alt=""), which signals to screen readers to skip them. This practice supports accessibility compliance and improves how search engines index your images.
3. Audit and Clean Up the Library Periodically
Unused attachments, duplicate uploads, and oversized originals accumulate over time. Schedule periodic Media Library audits using WP-CLI’s media commands or a plugin like Media Cleaner to identify and remove orphaned attachments. Before running any bulk deletion, ensure you have a current backup. A lean Media Library loads faster in the admin interface and reduces database query overhead on the front end.
Frequently Asked Questions
Where are Media Library files stored on the server?
Uploaded files are stored in the /wp-content/uploads/ directory, organized into subdirectories by year and month. WordPress also stores metadata about each file — dimensions, generated sizes, alt text, captions — in the wp_postmeta table in the database.
Why does WordPress create multiple versions of each image?
WordPress generates multiple size variants so it can serve the most appropriate size for each context. A thumbnail in a widget sidebar doesn’t need to load the same file as a full-width hero image. Default sizes (thumbnail, medium, large) are configured in Settings > Media. Themes and plugins often register additional custom sizes. All generated files are stored alongside the original in the uploads directory.
Can I add folders to the Media Library?
WordPress’s default Media Library doesn’t support folders. Several plugins add folder organization functionality — including WP Media Folder, FileBird, and Enhanced Media Library. If you manage a large volume of images across many categories, a folder plugin can significantly improve your workflow.
What happens if I delete an image from the Media Library?
The file is permanently removed from the server and its database record is deleted. Any posts or pages that display that image using its attachment ID or direct URL will show a broken image. Before deleting, use the “Attachment Details” panel to verify where the image is used, or use a plugin that scans for image usage across your site.
Does the Media Library affect page speed?
Indirectly. The Media Library itself doesn’t affect front-end page speed, but how images are managed through it does. Large original files generate large size variants. Missing dimensions in the database prevent WordPress from adding proper width/height attributes, causing layout shift. Poor image optimization practices accumulate into significant performance issues. Managing images well through the Media Library supports good lazy loading behavior and overall site speed.
Related Glossary Terms
How CyberOptik Can Help
Managing a WordPress site well means keeping the backend organized and efficient — and the Media Library is a bigger part of that than most site owners realize. Our team handles WordPress development and maintenance for clients every day, from image optimization workflows to media cleanup projects to full site rebuilds. Get in touch to discuss your project or explore our WordPress development services.

